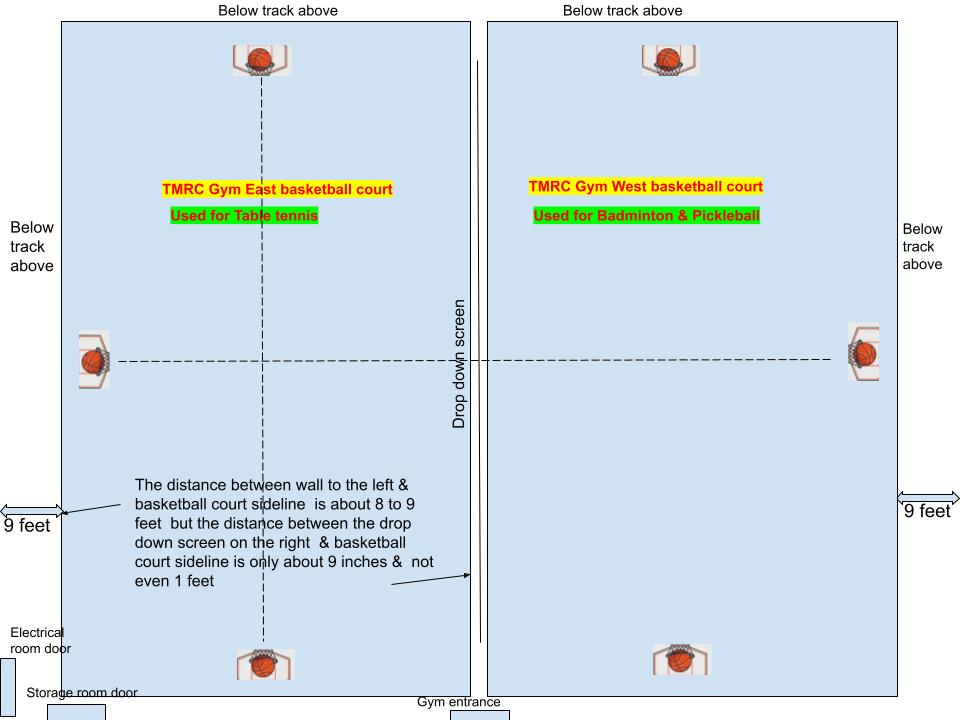
TMRC Basketball court side lines offset
Please read the disclaimer page first if you can.
Please read the note inside the diagram first. What this means is that the barriers in the middle can move at least 3.5 feet towards the side wall from the center of the basketball court. But ideally, the barriers can move more like 5 feet towards the wall. Why? To make the court length of the 6 courts to the right (towards the divider screen) longer than the 6 courts towards the side wall. Why?
Advanced players (or anyone needing a longer court) can use additional length. Beginner & intermediate players do not need longer courts & if they need one, they can still sign up to play on one of the 6 longer courts on the screen side. All this is further explained in the 12 table court diagram in another webpage.
It would have been nice if they had added some lighting below the tracks, but most players questioned stated that the lighting was sufficient (if not ideal) since the lighting otherwise elsewhere is worse after renovations anyway LOL.
Another important reason for moving tables further towards the side walls is that players or others should not be wandering constantly against the side walls or storing personal items against the side wall, both of which increase injury risk due to collisions. This is also why it is totally unnecessary to walk to a signup board on the back wall. For the same reason, there should not be any bleachers against the side or far walls.